
Error de formato de correo electrónico
emailCannotEmpty
emailDoesExist
pwdLetterLimtTip
inconsistentPwd
pwdLetterLimtTip
inconsistentPwd

Noticias
How to Fix a Stair Handrail to a Wall: A Step-by-Step Guide with Acrylic LED Handrail Integration
A stair handrail is not only a functional safety feature but also a design element that adds style and elegance to any staircase. Properly fixing a handrail to a wall is essential to ensure stability and security. In this blog post, we will provide a step-by-step guide on how to fix a stair handrail to a wall, with a special focus on integrating an acrylic LED handrail for a modern and visually appealing touch.
Step 1: Measure and Mark
Start by measuring the desired height and length of the handrail. Use a tape measure to determine the appropriate height for the handrail, typically between 34 to 38 inches (86 to 96 cm) from the stair tread. Mark the desired height on the wall using a pencil.
Step 2: Locate Wall Studs
Locate the wall studs using a stud finder. Wall studs provide the necessary support and stability for the handrail. Mark the location of the studs on the wall using a pencil or masking tape.
Step 3: Install Handrail Brackets
Position the handrail brackets on the wall, aligning them with the marked height and stud locations. Use a level to ensure the brackets are straight. Mark the screw hole locations on the wall through the bracket holes. Pre-drill pilot holes at the marked locations to make screw installation easier.
Step 4: Attach Handrail Brackets
Securely attach the handrail brackets to the wall using screws. Make sure the brackets are tightly fastened to provide a sturdy base for the handrail. Use a screwdriver or drill to drive the screws into the pre-drilled pilot holes.
Step 5: Cut and Install Handrail
Measure and cut the handrail to the desired length using a saw. Ensure the ends are cut at a 45-degree angle for a clean and professional look. Place the handrail onto the installed brackets, aligning it with the brackets’ screw holes. Insert screws through the brackets into the handrail to secure it in place.
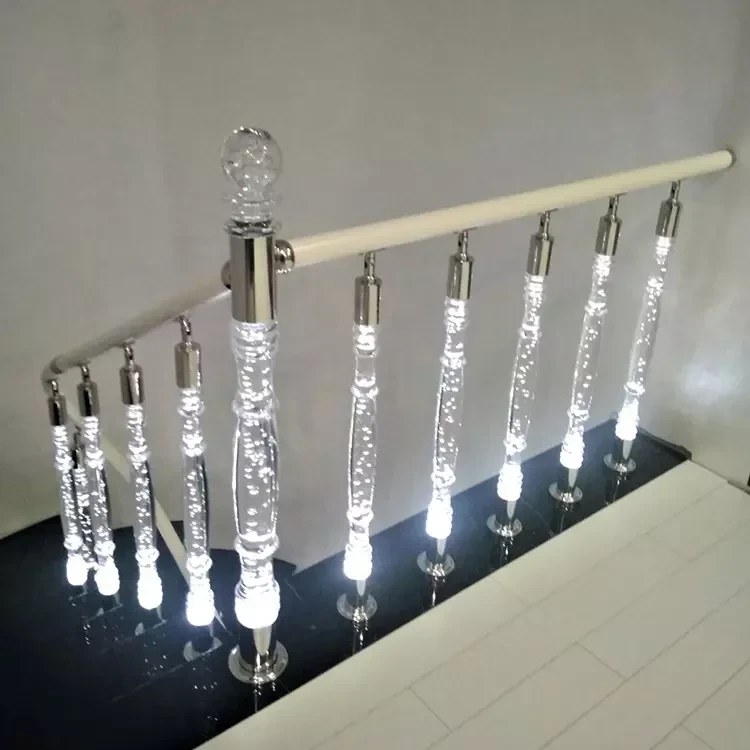
Step 6: Integration of Acrylic LED Handrail
For those looking to add a modern touch to their staircase, integrating an acrylic LED handrail can create a stunning visual effect. Acrylic LED handrails are available in various colors and can be customized to fit the length of the handrail. Follow the manufacturer’s instructions to install the LED strips within the handrail. Connect the LED strips to a power source and test the lighting effect before securing the handrail to the brackets.
Step 7: Finishing Touches
Once the handrail is securely fixed to the wall, check for any loose screws or wobbling. Tighten any screws if necessary. Use a putty knife to fill any visible screw holes with wood filler or putty. Sand the filled areas and paint or stain the handrail to match the surrounding decor.
Conclusion
Fixing a stair handrail to a wall is a straightforward process that requires careful measurement, proper bracket installation, and secure attachment. By following this step-by-step guide, you can ensure a sturdy and visually appealing handrail for your staircase. For those seeking a modern touch, integrating an acrylic LED handrail can elevate the aesthetics and create a stunning lighting effect. Remember to prioritize safety and consult professionals if needed during the installation process.